MetaMask is one of the most popular, secure, and versatile wallets on the market. It provides full ownership of funds for its users, unlike centralized exchanges. MetaMask is the most popular wallet for interacting with various dApps, NFTs, Metaverse games, and more. This article covers everything you need to know on how to set up your MetaMask wallet, integrate it with both your desktop and mobile devices, and add various chains to your wallet so you can become a part of the crypto revolution.
Step 1: Download MetaMask
If you’re using an Android or iOS device, download the MetaMask wallet from the Google Play or Apple store. Download the Google Chrome MetaMask extension for desktop devices and add it to your browser.
Step 2: Create your first account
On your mobile device, follow the prompt to create a new wallet. Please create a password for your wallet and confirm it.
Next, secure your wallet with the recovery phrase. The recovery phrase contains 12 words in a specific order. Write them down on a piece of paper and save them in a safe place.
Confirm your recovery phrase by entering each word in the correct order on the next screen. Once the words have been entered, complete the verification. That’s it, your done!
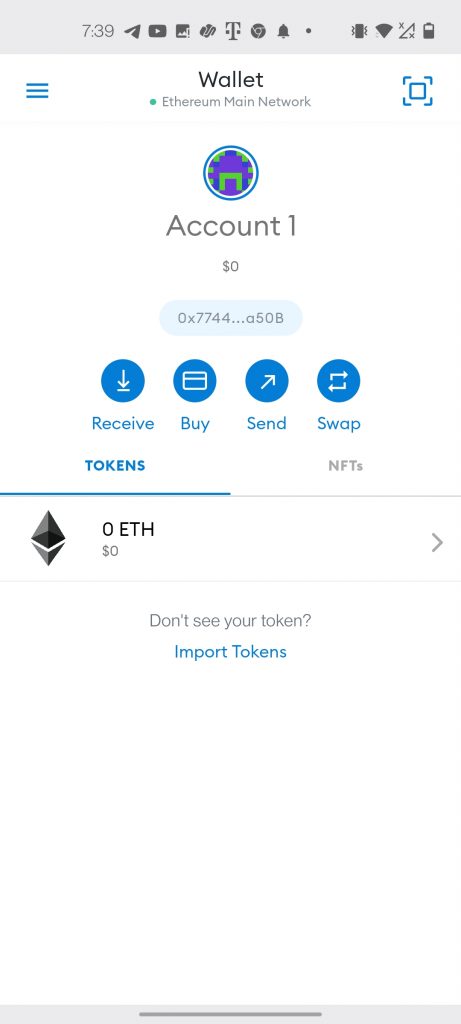
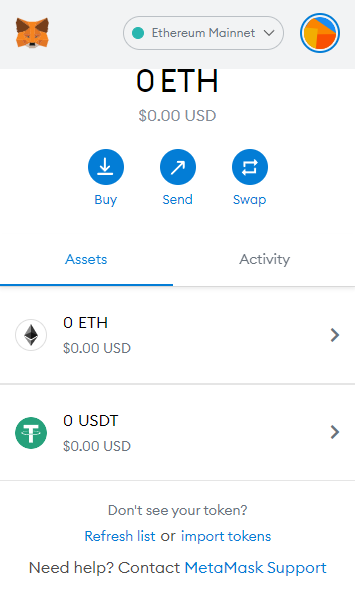
You should see your first account titled “Account 1” and your Ethereum address below it.
Step 3: Import your mobile account to your Chrome extension
It’s best to import your MetaMask account to your chrome browser extension on your mobile phone. This enables you to use the same account to interact with various dApps, making it easier to keep track of your balances.
This step is optional, and you can set up an entirely new account on your Chrome browser. However, we recommend linking the two accounts.
Open your MetaMask wallet on Chrome and select Import Wallet. To get your private key from your mobile wallet, head over to Settings, Security & Privacy, scroll down, and select Show private key.
Copy the private key and email it to yourself. Open the email on your desktop and import the private key into Chrome.
NOTE: Make sure to delete the email with your private key, as anyone that gains access to it will be able to steal your funds.
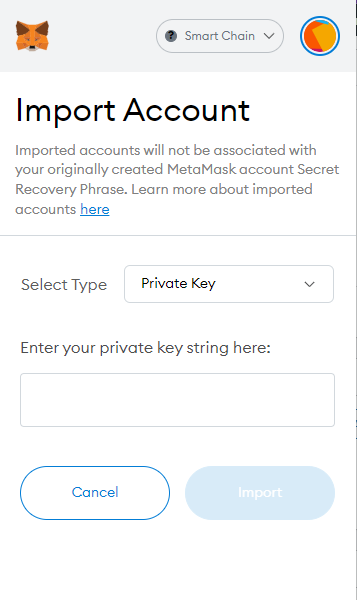
Paste the private key into your chrome extension, and you should see the same account ending with the same letters/numbers show up on your MetaMask extension.
At this point, you’ve linked your mobile wallet with your desktop chrome extension, and any funds you receive from your mobile wallet will show up on your desktop.
Step 4: Adding different chains
By default, MetaMask runs on the Ethereum blockchain. However, many dApps will require you to switch networks and operate on different chains.
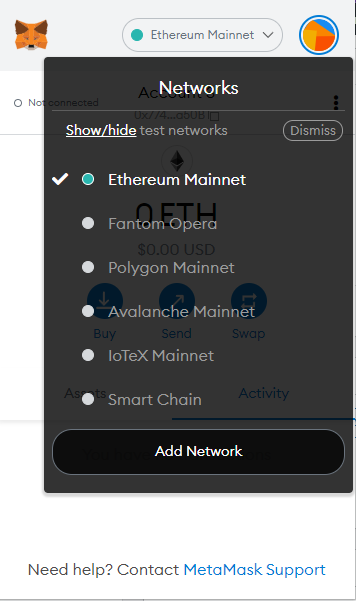
To add a different chain, click the dropdown menu that says Ethereum Mainnet. Select Add Network and add the following fields to add the Binance Smart Chain:
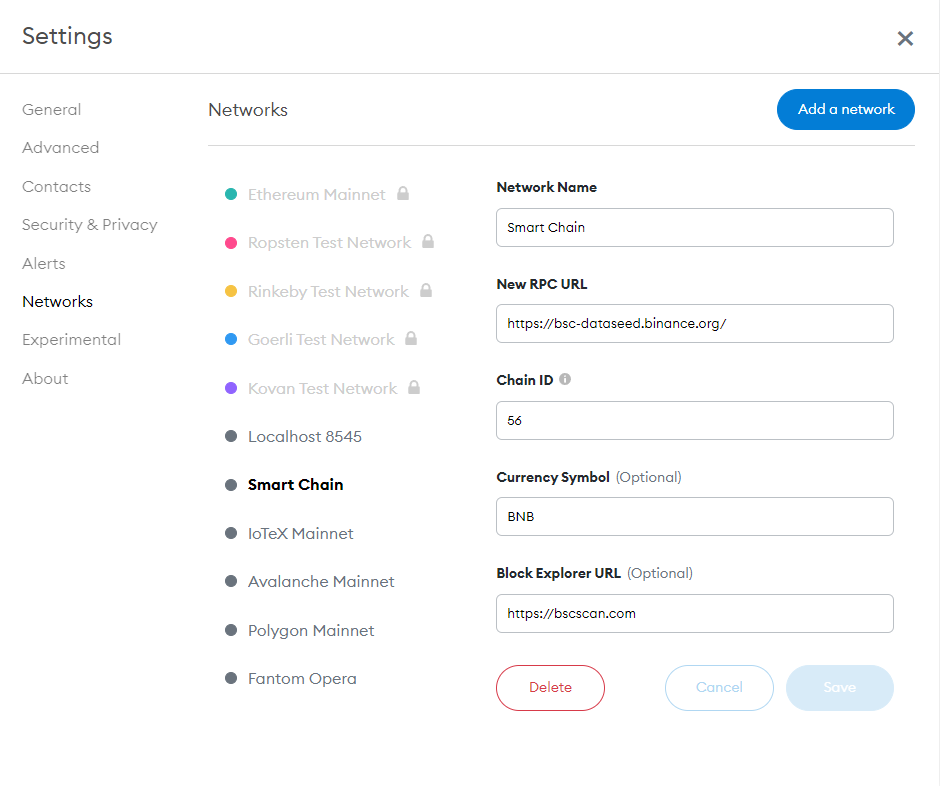
- Network Name: Smart Chain (You can put any name you like)
- New RPC URL: https://bsc-dataseed.binance.org/
- Chain ID: 56
- Currency Symbol: BNB
- Blok Explorer URL: https://bscscan.com
Once you add the chain, you will be able to switch to different chains by selecting the dropdown menu.
Keep in mind there are dozens of chains, and depending on the dApp you want to interact with, you might have to add another network. The most popular chains are Ethereum and Binance. Some other popular ones include Avalanche, Polygon, and more.
Step 5: Adding different tokens
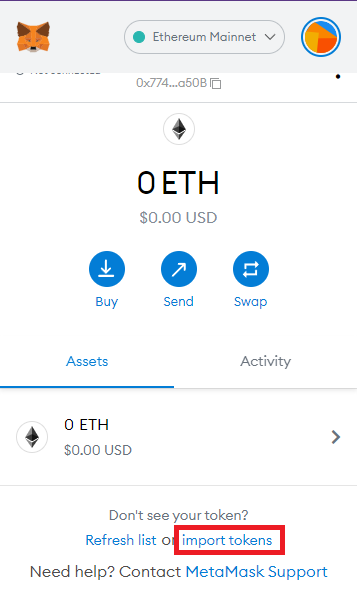
By default MetaMask only shows Ethereum. However, you can easily add various tokens to your wallet.
To add a token, click import tokens at the bottom of your wallet.
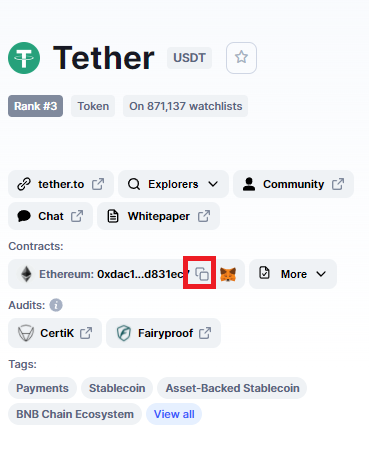
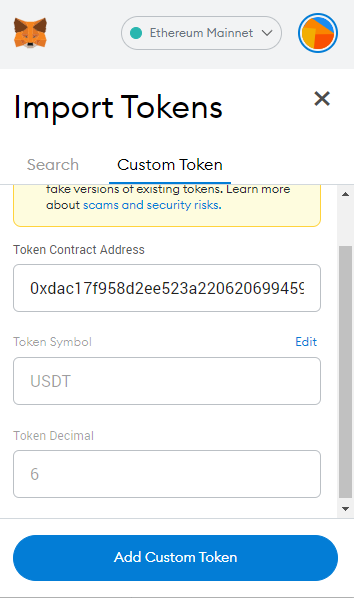
You will need the token contract address. Paste it, and the token should show up. You can try adding a token by heading over to CoinMarketCap, navigating to any of the tokens, and clicking the copy button under the Contracts.
Once you paste the token address, the Token Symbol and Token Decimal should populate automatically, and the token will show up in your wallet.
Conclusion
There you have it! You now know the basics of using your MetaMask wallet. You know how to switch to various networks and add tokens.
Now have fun exploring the vast cryptocurrency ecosystem!
It’s worth mentioning that you should store your 12-word recovery phrase in a safe place. You can write it on a piece of paper and put it in your documents folder, a home safe, or even in your safety deposit box if you have one.
Follow us on Twitter @thevrsoldier to stay updated with the latest Metaverse news!